Showing posts with label Camping. Show all posts

Wednesday 8 May 2024

Can you sleep a family of four in a Defender?

The short answer is yes, but read on if you want to know how!

4-berth Defender Camper Interior Layout

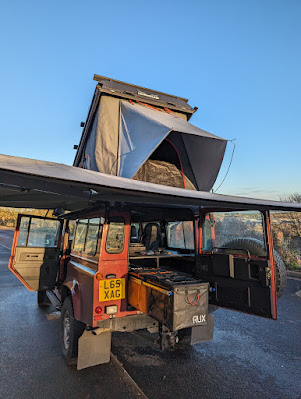
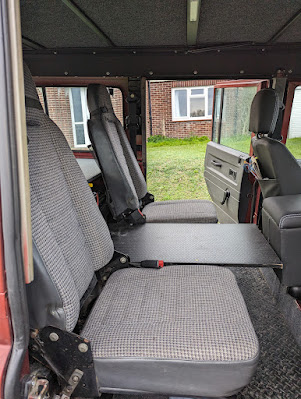
It has taken a lot of planning, but we've come up with a solution that allows us to retain the middle (second) row of seats for the boys while travelling and then convert the rear area into two beds for sleeping.  While the boys sleep downstairs, Sarah and I get the big bed up in the roof, in our Alu-Cab Icarus roof conversion.

Planning a 4-Berth Defender Interior Layout

There is lots of information online about camper layouts if you've got the standard Transporter, Sprinter, Crafter or Transit Van, but not much about Defenders.  If you want a family friendly, 4-berth Defender layout that retains four travelling seats, there's even less!  

The standard Defender Camper layout usually involves fixed cabinetry along one side, and some form of pull out bed on the other.  While the boys are still pretty small this might have worked, but we couldn't see them wanting to share a narrow bed for long!  The standard layout usually also involves removing the second row of seats, but this wasn't an option for us.

We did get some layout inspiration from our friends at whereistheworld, and from YouTube videos by Off-Track Family.  

After many hours sitting in the back of the Landy, measuring, sketching, and even a bit of 3D modelling in SketchUp, we eventually came up with our own solution, and I must say we're really pleased with it!

Defender Camper Interior Layout

Our Goals for the Interior

1. Retain at least four travelling seats (with seatbelts)

2. Maximise storage space

3. Full width sleeping area for the boys

4. Space for a cooler

5. Re-use as much of our existing camping gear as possible

6. Quick setup and stow

The Interior Build and Storage Solution

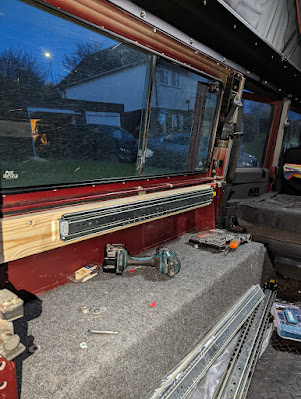
Our layout consists of a fixed platform in the back, which we built to fit under the lip at the top of the tub.  This is supported on two wooden beams which use the existing holes in the tub capping.  

Fitting a camper interior to a Land Rover Defender 110

Fitting a camper interior to a Defender 110

The platform is cut from 15mm lightweight eucalyptus plywood with a black phenol hexagon coating.  The platform is also supported by a vertical section of ply, which is slightly offset from centre for our sliding storage solution.

Land Rover Defender 110 Camper Interior Layout

We were really keen to make use of our existing RUX system, so used heavy duty drawer sliders from Aolisheng, and built a frame to support two 70 litre RUXs.  

RUX 70l in a Defender Camper

RUX storage solutions for Defender Camper

If you haven't come across RUX before, the 70l is a rugged, compressible, weatherproof, soft sided gear storage container with a wide rigid opening for easy access, a secure stowable lid and modular straps for easy carry.  Designed in Canada, and now also available in Europe, we use them all of the time!


We decided to remove the middle seat from the second row, and used the existing frame to build a platform for our Yeti cooler.  The Yeti Tundra 45 fits perfectly, and the Harvest Red is almost a match to Budgie's paintwork!

Land Rover Defender Campervan

Yeti Tundra 45 in a Defender Camper

In order to retain the boys seats, but still give them a full length bed; we used another two pairs of heavy duty drawer runners and built two sliding extensions, which pull out over the top of the folded middle row seats.  It only takes a couple of seconds to fold the seats forward and slide out the extensions.


We then had some custom foam cut to size.  The foam for the extensions is 1.5" thicker than the foam on the fixed platform, which gives a nice flat surface for the boys to sleep on.


With Sarah and I sleeping up in the Icarus roof, we've comfortably got space for all four of us to sleep, and we're happy that we achieved the goals of our interior layout.

Read more about the rest of Budgie's camper conversion.

* Some of the links on this post are affiliate links.  It won't cost you any more, but we may receive a small payment if you purchase through our links.  We will never recommend a product which we haven't fully tested and love. 

Monday 22 April 2024

A Defender Road Trip to France and Northern Spain

We had a brilliant Easter holiday in France and Spain with Budgie.  We were away for 10 days and covered over 1750 miles (2850 km), making it all the way down to the Spanish Pyrenees.

Alu-Cab Defender Camper in the Spanish Pyrenees

As is usual for our road trips, we did a few long travelling days, but interspersed these with shorter days and one two-night stay in San Sebastian.

Ferry to France


We chose to take the DFDS ferry from Newhaven, in Sussex, to Dieppe, in Normandy.  For us, Newhaven is only about an hour and a half away and this route was considerably cheaper than the alternative routes from either Portsmouth, Dover, or Plymouth.   


The ferry takes around 4 hours.  We travelled both ways on the Seven Sisters vessel, which was very comfortable and had great facilities onboard.  The boys highly recommend the croque monsieur and the sausage rolls!

DFDS Seven Sisters

The return ferry departed Dieppe at 0630, so we decided to get a cabin for this leg.  We booked a four berth outside cabin, which had two sets of bunks and an ensuite bathroom.  We were heading straight up to Edinburgh when we disembarked, and after the early start we really wanted to make sure we got some sleep on the ferry.  It was definitely worth the extra cost!

4 berth cabin on the DFDS Ferry Seven Sisters

Top Tips for Driving in France and Spain


1. Check the Crit'Air Clean Air Zones

The first bit of travel to Ballon-St-Mars took us a bit longer than expected as we diverted around the Rouen clean air zone.  Budgie is too old to register for the French crit'air system, so to avoid fines we just had to avoid the zones completely. It only costs around 5 Euros for a sticker or 'vignette' if your car is eligible for the scheme, so make sure you check this out before you travel.  Ensure you use the official French government site, as there are a number of scam sites around.

2. Consider avoiding the Toll Roads

Google maps also took us on a couple of toll roads on the first day, which I think costs us around 30 Euros.  The next day we selected 'Avoid Tolls' in the maps application, which made life much easier for route planning.  Most of the toll roads have a maximum speed of 130 km/h (80 mph) which is pretty much out of reach for Budgie, so we were much more comfortable travelling on the slower roads.  These routes also took us through some beautiful towns and villages, and made stopping at the delicious boulangeries easier!

3. Take the required equipment and documentation

There is additional equipment required for driving in Europe; some is obvious, like headlamp deflectors, but others are not so intuitive, such as reflective jackets for all passengers which must be carried in the cabin.  The RAC has a handy driving in Europe checklist, so be sure to check this before you travel.

Finding Camp Sites in France and Spain


Unusually for us, we didn't really have much of a plan for the rest of the holiday, other than to hopefully catch some sun and a vague aim of getting to Northern Spain and maybe Portugal. 

We ended up staying at a mix of campsites, off-grid park ups, and aires, which we felt gave us a nice balance of facilities and some stunning locations.

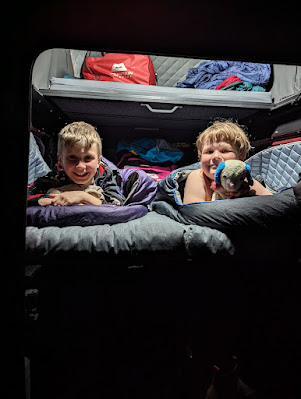
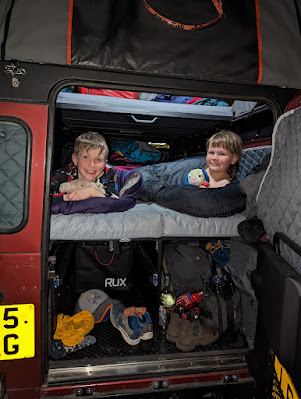
We had only booked one camp spot in advance, and that was for the first night, as we wanted somewhere to aim for within a fairly short drive after disembarking the ferry.  We booked Ludovic's site in Ballon-St-Mars through PitchUp.  It was a great small site with the added bonus of a small cabin with a hot shower and a sitting / dining area.  The boys loved their first night in their newly built sleeping area:

Kids sleeping in a Land Rover Defender Camper

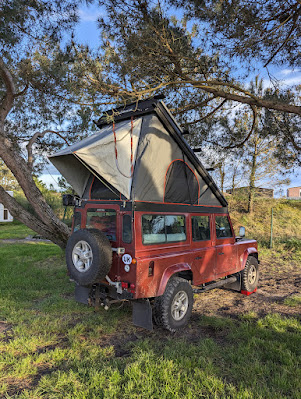
For our second night, we had aimed to get across the border into Spain, but we were enjoying taking our time and exploring, so decided to have a shorter day and stop on the coast in France.  We headed to the small town of Andernos-les-Bains, which sits on the beautiful bay of Bassin d'Arcachon, and our first 'Aire de Camping Car'.  

Aires come in a variety of forms in France (the literal translation is just 'area'), from motorway services, or picnic areas, to camping zones with facilities.  They are often free, or charge a small fee for overnight parking.  We picked up a guide to camping aires at a local supermarket, but you can also find them in maps, and they are usually signposted from the main road or entry into a town.  

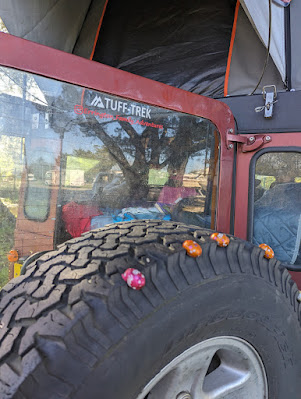
The aire in Andernos-les-Bains was a simple area of ground alongside a quiet no through road on the edge of town.  It is minutes walk from the beach and some great seafood restaurants.  The payment machine was out of order, so we stayed for free!  The following morning we woke up to find that the Easter Bunny had managed to track us down in France and had delivered some chocolate eggs for the boys to find:

Easter Eggs on a Defender

Defender Camper at Andernos-les-Bains Aire de Camping Car

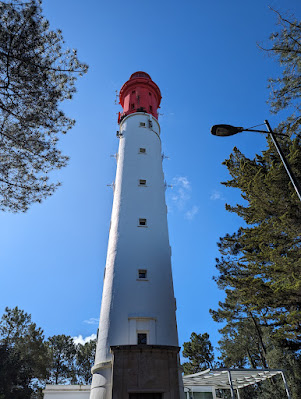
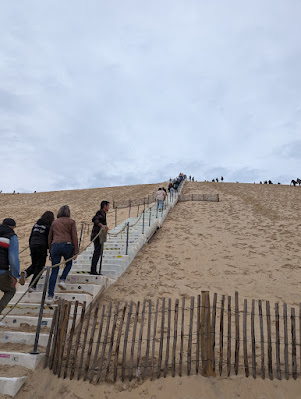
We spent the next day exploring the Arcachon area, including the Cap Ferret lighthouse and the amazing Dune du Pilat:

Phare du Cape Ferret

Steps at Dune du Pilat

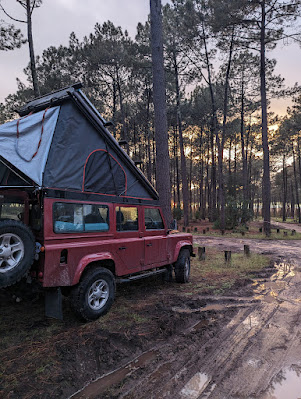
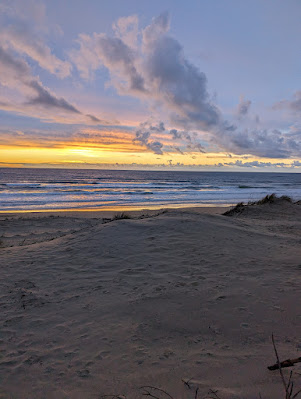
We spent the night in another aire, just down the road in Biscarosse Plage.  After hotdogs in the rain, we were treated to a stunning sunset:

Defender Camper at Biscarosse Plage Aire du Camping Car

Sunset at Biscarosse Plage

Next we headed down to San Sebastian, in the Spanish Basque region, and spent a great couple of days exploring this beautiful coastal city.  We stayed at WeCamp San Sebastian, which is in a great location on top of the cliffs at the edge of the city; with a regular local bus service into town.  It's a very clean and tidy campsite, with a lovely cafe bar on site and an outdoor pool (sadly we were too early in the season for it to be open).  It was nice to spend a couple of days relaxing at a site with facilities.

San Sebastian Corniche

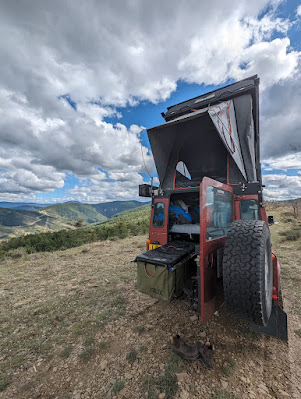
While in San Sebastian, we decided we weren't going to have time to make it over to Portugal without some very long drives on the way home, so instead we headed down to the Pyrenees.  It was a beautiful drive down to the mountains, and we found an absolutely stunning off-grid park up on top of a hill through the park4night app:

Defender Camper off-grid in the Pyrenees

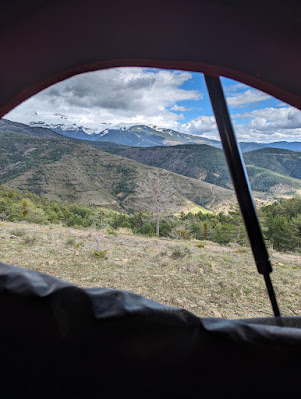
Pyrenees mountain view from the roof tent

After crossing the border back into France, we headed north to a great campsite we found on HipCamp.  (Use the link for $/£10 off your first booking.)  Camping D'Artagnan is run by a British couple and they also have a British style pub on site!

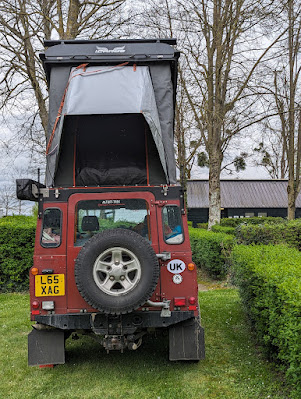
Defender Camper at Camping D'Artagnan

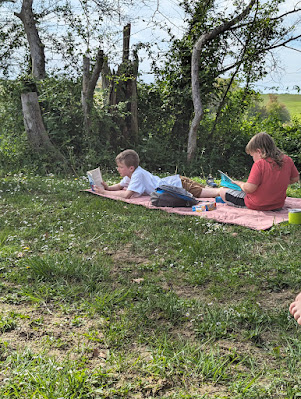
Boys relaxing at Camping D'Artagnan

From here we headed up to La Rochelle.  Our next camp was another site from park4night, there were no facilities, but it was right on the sea front and next to a brilliant seafood restaurant, La Cabane de Pampin.

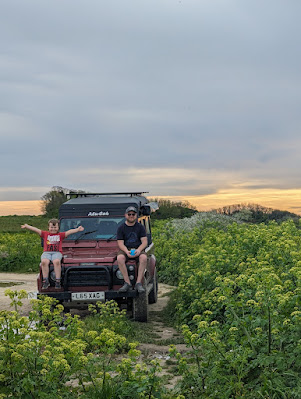
Sitting on the bonnet of a Defender

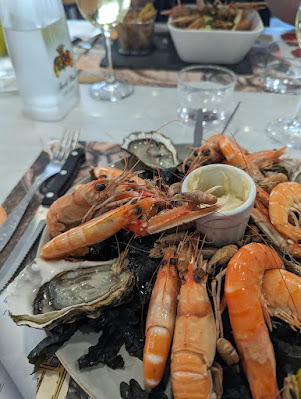
Seafood platter at Le Cabane de Pampin

The next day we drove up to Mont St Michel.  As we were taking the shuttle bus over to the island to explore, we noticed a campsite right by the causeway.  It turned out a night at the campsite wasn't much more expensive than the parking we had already paid for.  So, top tip; book the campsite online and you can drive straight in!

Defender camper at Mont St Michel

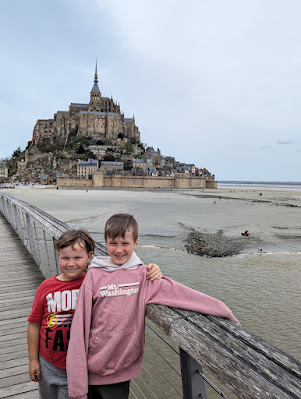
Boys with Mont St Michel in the background

Exploring Mont St Michel

Our last stop of the trip was another aire, this time right in the heart of Dieppe.  We wanted a camp spot near to the ferry due to the early start, and this fit the bill; as well as being right next to the beach, it was a short stroll to the bars and restaurants of the quayside in Dieppe.

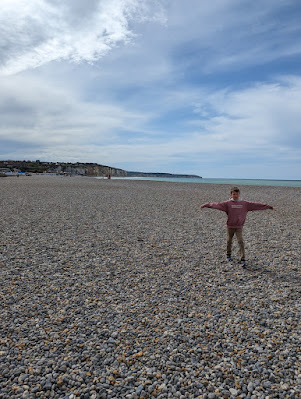
Dieppe beach

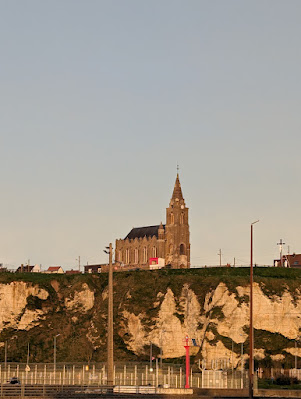
Dieppe church

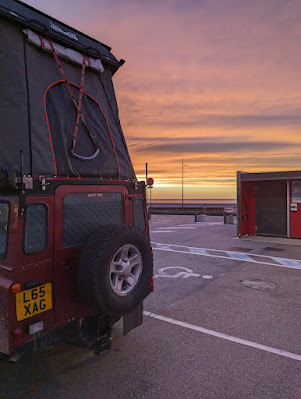
Defender at sunset in Dieppe aire de camping car

Let us know if you have any other sources for campsites, and if you'd like to see our full route, check us out on Polar Steps!

Ridley Errington on Polar Steps

Read on for info about Budgie's camper conversion.


Thursday 3 August 2023

Pender Island

We're just back from a great long weekend on Pender.  We've been to Pender a number of times in our boat but never stayed there before, so it was great to explore more of the islands. 

About Pender Island


Pender Island actually consists of two islands; North Pender and South Pender separated by the Pender Canal.  This narrow channel was dredged in 1903, and a single lane trestle bridge was built over the canal in 1957.  Originally home to the Coast Salish peoples, there are now around 2,250 permanent residents. 

Pender Canal and Bridge

Getting to Pender


We had planned to boat over to Pender, but we had some issues with the fuel system on our outboard, so decided to take the ferry over instead.  Normally we launch at the Tulista boat ramp in Sidney and land at the Port Browning Marina in North Pender.

The ferry service goes to Otter Bay on North Pender with BC Ferries from either Swartz Bay (Sidney) on Vancouver Island, or from Tsawwassen (Vancouver) on the mainland. There are multiple sailings per day, and most ferries are direct to Pender, but some stop in either Galiano, Mayne, Salt Spring or Saturna.  
The ferry from Swartz Bay is not bookable, you just buy a ticket at the terminal, ticket sales for vehicles close 3 minutes before departure and 5 minutes for foot passengers.  The ticket is a return, so no need to buy another ticket on the way back.


There is no public transport on Pender, but there is a semi-formalised system of hitch-hiking.  Multiple 'Car Stops' are located around the island, often with a handy chair! 

Pender Island Car Stop Sign

Where to Stay on Pender


We stayed at the brilliant Woods on Pender, and would highly recommend it.  Sarah and I rented a small airstream trailer called The Nest, while Sarah's parents took a nearby cabin with the boys!  


The Nest has a beautiful deck with sea views and an outdoor shower, while Cabin 2 down the hill has a hot tub. 


 'Coffee+Kitchen' on site serves great coffee and pastries in the morning and is open for dinner reservations on Friday and Saturday evenings.

Gulf Islands National Park has two campgrounds on Pender; front country (drive-in) camping at Prior Centennial and back-country (walk or boat-in) at Shingle Bay.  The campground at Beaumont on South Pender is closed until further notice.

Port Browning Marina has glamping tents, a rental RV and camping spots on the large grassy field in front of the pub.  There's even an outdoor swimming pool and kayak/SUP rentals on site.

Top Things to Do on Pender


1. Visit the Farmers Market - held at the Pender Islands Community Hall on Saturdays at 0930-1300 from the May Long Weekend to Labour Day Weekend.  There's a great variety of local artists and food producers.

2. Take a hike to the viewpoint at Oak Bluffs Park and look for whales.  This is a short but steep trail through the woods and up onto the bluffs looking back towards Vancouver Island.  Viewpoint No2 has more open views and a picnic table.  We've often seen Humpback and Orca in this area from our boat, but didn't have any luck from shore this time.


3. Skip some stones at Mortimer Spit Park while admiring the view of the Pender Canal Bridge.


4. Wine tasting at Sea Star Vineyards and Winery.  Choose a flight of wine, and find your favourite while enjoying the gardens.  There is a food truck on site serving some very good looking seafood inspired meals.  Unfortunately for us they had sold out on our visit, so we didn't get to taste it!


4. Cider Tasting at Twin Island Cider.  We actually tried the ciders at the Farmers Market, but the cider house is open for tastings Thursday - Sunday. 

5. Lunch at the HUB at Hope Bay. This stylish Mediterranean restaurant overlooking the ocean serves great food (and cider from Twin Island!).

6. Port Browning Marina - no trip to Pender would be complete without a visit to 'The Pub'.  Enjoy a drink or some food on the deck, while admiring the views over the bay.


While you're here, check out some of our other favourite spots in the Southern Gulf Islands.  What's your favourite island?


Wednesday 26 July 2023

San Josef Bay by SUP and Canoe

San Josef Bay, in Cape Scott Provincial Park, is rightly famous; recently making the Top 50 of the World's Best Beaches.  With it's stunning sea stacks and beautiful white sandy beach, it's easy to see the attraction.
San Josef Bay Sea Stacks 

San Josef Bay Beach

Getting to Cape Scott Provincial Park 

Despite its remote location on northern Vancouver Island, San Josef Bay is the most accessible beach in Cape Scott Provincial Park; it's an easy 45 minute walk in from the trailhead.


Getting to the trailhead involves a roughly 70km drive along gravel logging roads from the junction at Port Hardy.  These are active logging roads and are pretty rough; take it slow, drive with headlights on, and make sure you have a spare tire (and the tools and ability to change it).  There is no cell service beyond Port Hardy.  Allow at least an hour and a half for this part of the journey.

A 45 minute walk in wasn't quite adventurous enough for us, so we decided to get to San Josef Bay by SUP.  Clearly we couldn't get all of our camping gear, plus two adults, two kids and a dog on our two SUPs, so we roped in our great friends to come with us in a Canoe (and carry a load of our gear - thanks Natasha and Henry!).

SUP Canoe San Josef Bay

San Josef Boat Launch


The boat launch on the San Josef River is operated by BC Parks, but is accessed through the San Josef Heritage Campground which is a private campground. The launch isn't obvious, but the precise what3words address is  ///cherish.drifts.abandoned.  

San Josef River Boat Launch

Officially you shouldn't park at the launch, but should continue on to the trailhead parking and then walk back (roughly 1km).  We spoke to the Heritage Campground manager though and he allowed us to park near the launch for a small fee.

It's a steep and narrow gravel launch which is best suited for small boats, SUPs and kayaks. 

Paddling the San Josef River


The San Josef River is tidal right up to the boat launch, and is only navigable at close to high tide.

We timed our departure down the river to roughly an hour after high tide so that we still had sufficient depth (roughly 3m height of tide at Cape Scott), but also benefitted from the ebbing tide to help us down the river.

Canoe SUP San Josef River


On the way back up the river we left the beach roughly 3 and a half hours before high (with just under 2m height of tide at Cape Scott).  We had a nice gentle current from the flooding tide helping us up the river, but we did just touch the bottom of my SUP fin at parts of the river.  I'd recommend waiting another half an hour or so to ensure you have sufficient depth.

You can check the tide times and predicted heights on the Government of Canada tides site.

Its roughly a 2.5km paddle, and with the tide with us in both directions it took less than an hour of leisurely paddling on our (heavily laden) SUPs and Canoe.

There are a few dead heads in the water, but there were no big overhanging trees or anything, and with the gentle flow it was a safe paddle to the estuary.  We stopped while still in the river and protected from the waves at the mouth.  Its a short walk from here to the top of the beach, where there are informal camping areas.

San Josef Bay Beach

Camping at San Josef Bay


Camping at San Josef Bay is 'random wilderness' camping.  There are no formal pitches, and you are encouraged to camp on the beach.  

Tent at San Josef Bay


There are bear caches and pit toilets.  Practice leave no trace principles and pack out what you pack in - there is no means to dispose of garbage in the park.  Also ensure you follow the Bare Campsite rules; we really enjoyed watching a large black bear feeding just across the river at low tide.  Remember - a fed bear is a dead bear!

Black Bear at San Josef Bay

There is a water source on the second beach, which is only accessible at low tide, but water must be treated before use.

Be sure to check out our Camping Gear page for more details on the kit we used on our trip.