Showing posts with label Gear. Show all posts

Tuesday 16 May 2023

Camping Kitchen Set Up

Hopefully you've already checked out our posts on choosing a tent and sleeping systems.  We thought we'd continue the gear recommendations with our ultimate kitchen set up for car (or boat) camping.  These are our favourite bits of kit which make our camping experience so much easier - some may seem slightly dull, but when you need them they don't feel dull - they give us less worry, better ease of set-up and an organised camp (Ridley loves an organised camp!) and more time to enjoy what we are there for - the adventuring! 

Ultimate Camp Kitchen Set Up Gear Layout

Camp Organisation


We use one of our 70 litre RUXs as our Camp Kitchen organiser.  It's the perfect size to take all of our camp kitchen equipment, and usually still have room for some dry food items as well.  With multiple carrying options, the RUX is easy to move around from car or boat to the campsite, is waterproof, and keeps everything neat and tidy.


Coolers


A cooler is pretty essential if you want to keep fresh food (and beers) cool on a multi-day camping trip.  If you've been following us for a while you'll know we are massive Yeti fans.  Whilst they are expensive, they really do live up to their reputation of being 'built for the wild' and performing exceptionally.    Yes there are cheaper versions, but in our experience they can't keep stuff cool anywhere near as long as a Yeti.  We considered powered versions like Dometic (which are highly rated), but quite often we are off grid, so they weren't the right solution for us.

We tend to use the Tundra 65 for longer camping trips for our family of four.


We also use a Roadie 20 for weekend trips, or for carrying food to the RV or cottages.  Our version has now been replaced by the Roadie 24, which gets equally good reviews (including from Sarah's parents!).


For hiking or SUP'ing picnics we use the Backflip 24 which we love but has now been discontinued, as has the replacement version (stay tuned for a new release).

Don't skimp on the ice blocks either.  We were totally unconvinced by the Yeti Ice originally, but after multiple comparison tests, the Yeti Ice really does win.  It's so good that we've had melted ice cubes re-freeze on the Yeti Ice blocks!  


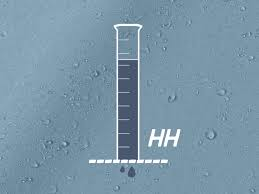
The below image gives you a good idea of how many blocks are recommended for each cooler.

Yeti Ice Configuration Chart

Camp Stove


We've just recently purchased a new camp stove; after living with a single burner suitcase style stove for a very long time, it has finally given up the ghost!  Our new stove is the Jetboil Genesis Basecamp System, it's a big upgrade in functionality, and seems like it's going to be great.


Cutlery and Dishes


Knife Set - we have set of these knives from Starfrit.  The protective covers are really helpful for keeping them safe while packed or while on the camping table and small people are around!


Cutlery Set - we have this set from Outwell, which comes in a handy carry case and also includes a small chopping board, dish cloths and the ever essential bottle opener!


Bowls / Plates - for our family of four we usually carry 8 bowls / plates, this means that if we don't get a chance to wash up after breakfast, we still have some plates for lunch or dinner.  We find that the plates with a raised edge can be used either as plates or bowls, and pack smaller than a mixture of bowls and plates would.


Coffee Press - no camping trip is complete without a morning cup of coffee.  This french press style coffee maker is made of a BPA-free shatter proof material.


Cups


Our campsite is never without some Yeti cups!  We usually take a combination of the Lowball Ramblers and Wine Ramblers.  The Lowballs have just been replaced with a stacking version, which will be much better for packing.


The wine version is great for wine obviously, but also a nice shape for a G&T or a campfire whisky!


Water Carriers


We've had a variety of collapsible water carriers over the years but none of them have been very effective or lasted well enough to recommend.  Last season we got a couple of the Yeti Gallon Jugs, and they have been great.


Washing Up


In order to have as minimal an impact on the environment as possible, we don't use standard washing up liquid while camping.  These Camp Suds are biodegradable, can be used with cold water (or even sea water if you're really short), a few drops go a long way, and they can also be used as shampoo!


We use a collapsible bucket as a sink, and use silicone sponges (as they don't go mouldy and can be popped in the dishwasher for re-use).  We generally pack a small packing cube with garbage bags, food waste bags, sponges and camp suds, and fire lighting tools, so that you can easily find them in your camp kitchen box.

We do have a collapsible table, and even a collapsible storage cupboard, but they don't often make it camping with us unless we can get the car right up to our camping pitch, we are staying for a long time, or we are using our big tent!


* Disclaimer this post contains affiliate links, which means we get a small referral fee if you follow the link, but it won't cost you any more. Everything on this list is actual equipment that we own and use regularly.  We will never promote equipment that we haven't fully tried and tested ourselves.

Friday 21 April 2023

Spring is here (hopefully)!

Well the ski season is over, at least on Vancouver Island, and it feels like Spring might actually be here.  Hopefully it isn't another false Spring this time!

For us it's time to pack away the ski gear and make the transition into camping and boating.  It's our last Spring/Summer in Canada before we head back to the UK and we've got lots of exciting adventures planned, so having our gear ready to go is important.

First up is pulling out the gear, and checking that everything still works.  Our big tent needs to go into the shop to repair a tear (naughty dogs!), the boat outboard has just gone in for a spring service, and we're thinking about updating our old camping stove (stay tuned to hear what we end up with).

Next up is packing away the ski gear.  We like to give our ski jackets and pants a wash and re-proof, and then make sure they are nice and dry before storing them until next season.  The Techwash from Nikwax works great.  Our skis will also go in for a tune up and a coat of summer wax to protect them until next season.

Spring is a transitional period for our activities, so keeping our gear organised and ready to grab is essential.  Our RUX 70l are perfect for this, we have one in storage with our ski gear, one packed with the boys skating gear, one packed with our camp kitchen, and one on standby for whatever gear we might need that day.  

The RUX App even allows you to build custom packing lists, and track the contents of each RUX with a QR code or NFC from your phone.  Check them out at the link below!


* Disclaimer this post contains affiliate links, which means we get a small referral fee if you follow the link, but it won't cost you any more. Everything on this list is actual equipment that we own and use regularly.  We will never promote equipment that we haven't fully tried and tested ourselves.

Friday 10 February 2023

Ski Trip Packing List

We're heading off to Whistler shortly for Struan's birthday; what else would a soon to be 9 year old want to do for their birthday!

I've just been gathering all of our ski gear together for the trip, and packing it all up, so thought now would be a good time to put together a packing list.  Nothing worse than getting to the ski hill or resort and realising you've left something essential behind.

What do I Need to Pack?

Ski Gear Packing LayoutKids Ski Gear Packing Layout


Ski Equipment

Lift Pass!

Skis *

Ski Boots * - be sure to get well fitted boots, they won't feel comfortable as such but shouldn't hurt, as the boys say they are 'ski boot comfy'. Badly fitted boots won't only ruin your day they can cause injury so spend time with your shop or hire store to be sure you have the right fit. We have also had Struan's boots heat fitted as his feet have grown and slightly changed size, but not enough for a new pair of boots so if your older boots start to pinch it is definitely worth doing. It didn't even cost us anything!

Poles *

If you are travelling by air, or new to skiing you may want to rent this equipment at the resort.

Helmet - many resorts now (quite rightly) insist on helmets for kids, but with Sarah and I having a couple of accidents over the years, I think you'd be mad not to wear a properly fitting ski helmet.  The picture below was taken shortly after an accident while wearing a helmet, it could have been so much worse without one.

Black eye ski injury

Goggles - a well fitted pair of goggles makes a huge difference, skiing blind is not fun! Sarah struggles with goggles and opted for a helmet with a built-in visor but this proved problematic in very rainy or snowy conditions when the inside got wet. We are yet to hit on the ideal goggles for Sarah but if we find that elusive beast we will be sure to let you know!

Backpack - not essential, but really handy for carrying extra layers, snacks for the kids, water etc.  I'd recommend a waterproof bag if possible - we really like our Seal Line Skylake Dry Backpack (and not just for skiing).

Ski Clothing

Ski socks - a decent pair of ski socks won't wrinkle up in your boots, and will keep your feet warm and comfortable.  Avoid cotton!

Base layers - thermal base layers are one of the most important items of ski clothing.  We're massive fans of merino wool for base layers; they're warm, comfortable, and naturally odour resistant!  Icebreaker make a great range of thermals in various weights, and I'm a massive fan of my new BN3TH full length merino bottoms. (Use the link above for $15 off your first purchase.)

Mid layer - depending on where and when you are skiing, and the weather on the day, you may need more or less mid-layers.  Quite often Innes and I don't bother with a mid layer, but Struan and Sarah almost always do.  An extra thermal, fleece or hoodie, will work just fine.  Like most outdoor activities, layering is key; so that you can add or remove layers as necessary.  This is where that backpack comes in handy!

Outer Layers - Ski pants (trousers) / Salopettes / Bibs and a Ski Jacket; waterproof and breathable are the keys here.  Outer layers designed for skiing also tend to be insulated for extra warmth.  We're big Spyder fans, and although they're pretty pricey, they are really well made and long lasting.  Their kid's range even has a 'grow with me' feature, which allows the cuffs and hems to be dropped as the kids grow.

Neck Warmer / Scarf / Buff - these contribute a lot more to keeping you warm than you would think; keeping the cold air from getting down your neck and also stopping snow from entering your jacket if you do take a head plant!  We tend to use thinner Buffs on most days (which you can use in loads of different ways) and a thicker balaclava type when it's really cold.

Gloves - I recommend two pairs of gloves, a thin inner pair for warmth and a waterproof outerlayer.

Extras

There a few other bits and bobs that aren't essential, but can make life easier (or more fun), so we think they're worth adding to your ski trip packing list.

RUX - we love our RUXs, they're perfect for carrying all of this kit!

Go Pro - if you don't have video for your favourite social site did your ski trip even happen?

Radios - we find our Rocky Talkies to be invaluable for keeping in touch on the mountain without digging around in your pockets for your phone.  We generally give one to Struan, so when he bombs off without us we can find him again!

Re-usable Water Bottle - we're all about reducing unnecessary plastic waste and if you've read any of our other posts, you'll know it has to be Yeti!

Flask - the boys love a hot chocolate to warm up, but often they come in giant servings, pop any left overs in the Yeti for later!  Also handy for your morning coffee fix while waiting in the ski lift queue.

Toe / Hand Warmers - sometimes these are necessary, especially if you are 'skiing the East', like we used to when we lived in Ottawa.

Carry Straps - the boys got these straps for Christmas from Sarah's cousin, you wouldn't believe the number of arguments they have saved about the boys carrying their own skis.  Highly recommended, in fact i'm not sure why we don't have them too!

Kids with Sklon ski carry straps

GoggleSoc - ski goggles can be expensive, protect your lenses from scratches with these great covers made from recycled bottles.  They also look cool.

Apres Ski

Canadian ski resorts are pretty relaxed, so you don't need much in the way of special clothing, you may just stay in your ski gear!  There are a few items worth adding to the list though.

Snow Boots - you probably won't want to wear your ski boots all day, so a warm pair of boots are great for heading down to the local bar or restaurant.

Toque (Hat) - a warm hat is handy for the evenings, although you can just re-purpose your Buff.

Sun Glasses (and Sunny Soc) - if you're partaking in some lunchtime or early afternoon apres, you may not want to wear your googles, but it can be bright on those patios!

Swim shorts / suit - if you're lucky enough to have a pool or hot tub for some apres ski relaxing.


Printable Ski Trip Packing List

If you'd like to print off the packing list, you can download a copy here.

Wednesday 9 November 2022

Camping Christmas?

Tent in the snow with Christmas Tree

Is it too early to talk about Christmas???

Sarah says no, so here we go!

We've put together a list of some of our favourite camping gear that we take on our adventures.  Everything on this list is actual equipment that we own and use regularly, so please don't think this is our Christmas wish list, it is just an easy way of us getting our recommendations to you - also don't feel you need to use Amazon, please go and support your local camping/outdoor stores if you can. 

All of these 'little' bits make our camping experience so much easier - some may seem slightly dull, but when you need them they don't feel dull - they give us less worry, better ease of set-up and an organised camp (Ridley loves an organised camp!) and more time to enjoy what we are there for - the adventuring! 

PS. Having found this photo online, Sarah now feels there's a Christmas Camping challenge to be had, who's up for it?!?

PPS. Couldn't get our favourite radios to add to the Amazon list - so try here.

Friday 14 October 2022

Tent Camping Sleep Systems

So, now you've chosen your tent (see previous post), you may be wondering what else you need for a successful camping trip.  

After your tent, the next most important thing is your sleeping system.  Generally this consists of something to keep you insulated from the ground and something to keep you warm.  Most campers opt for some kind of sleeping mat and a sleeping bag.

Sleeping Mats

Sleep Mats or Camping Mattresses can range from simple foam mats, through self-inflating mats, up to air beds.  Clearly there is a trade off between comfort and size/weight.  The key thing to look for is the R-value; this is a measure of the insulation and the higher the number the warmer it will be.  Values range from 1-10; less than 2 is only suitable for warm weather, a value of 2-4 is sufficient for 3-season use, and if you're going to be winter camping you'll need at least 4.5.  
   
Sleeping Mat R-values seasons
Once you've looked at the R-value, the next thing is the shape and size.  For back-packers, a thin mummy shaped mat will help save some space and weight, but if you are car camping you can afford to go for a thicker and larger rectangular mat.  We prefer rectangular shaped mats, as they can effectively cover the whole floor of the tent so if you (or the kids!) move around in the night you don't end up in a cold spot. 
We seem to have found a happy medium with self-inflating roll mats.  They give good thermal insulation, reasonable comfort levels, and roll up into a manageable size.  There are many versions available, and we've had a couple of different ones over the years.  We've tended to go for relatively cheap versions and although comfortable to begin with, unfortunately, they've all developed leaks at some point, so I can't recommend any particular brand from personal experience.  I've heard good things about Sea to Summit and Therm-a-Rest though!
Sleeping mats inside a tent

Sleeping Bags

Sleeping bags are generally rated by season.  A 1-season bag is only suitable for warm summer nights, a 2-season bag will extend the season from late spring to early autumn/fall.  If you want to start early in the spring and camp right through fall, you will need a 3-season bag, and for winter camping a 4-season.

The majority of sleeping bag manufacturers now also conform to an EN/ISO standard which allows direct comparison between bags.  According to the standard the comfort temperature is the lowest outside temperature at which an 'average' woman can have a comfortable night's sleep, the lower limit value marks the end of the transition range and is the lowest outside temperature for a comfortable sleep for the 'average' man.  The risk or extreme temperature is the survival temperature, a strong sensation of cold and risk of hypothermia exist at this temperature.  If you're really struggling to compare, just focus on the comfort temperature and make sure it's a couple of degrees below the minimum temperature you expect to be camping in.
Sleeping Bag ISO EN Standard
Sleeping bag shapes vary from simple rectangular bags to shaped 'mummy' bags with hoods.  Here are some pros and cons of each shape.  Generally I'd recommend a shaped bag, unless you are only planning to car camp in warm weather.

    Rectangular        Rounded        Mummy

    Roomy           Moderately roomy Close fitting

    Cheaper           Mid price range More expensive

    Bulky to pack Lighter and more compact Very light and compact

    Summer use only Suited for 2/3 Season use Best for 3/4 Season use

If you've filtered your search by comfort temperature and sleeping bag shape, it is then worth comparing packed size and weight.  Modern sleeping bags have come along way in the last few years and can now pack extremely small and still be comfortable.

We've been really happy with our Mountain Warehouse bags, and found Summit ones that could zip together to make a double (back in the day when we were young and in love!). However, we have just upgraded from the Summit to the Extreme version, due to it's very small packed size.  Sarah is always cold, so we also take a small packable outdoor blanket if we're expecting low temperatures.  We have some nice ones from Eddie Bauer.

Camping Pillows

We don't have a huge knowledge of camping pillows, Ridley only relatively recently agreed that they are a good addition having always insisted that our clothes would do just fine! Sarah, however, has always been more of a camping wimp and always used stuff sack style camping pillows. Sarah uses 2, the rest of us all have 1 each. They are certainly way more comfortable than their inflatable counterparts (or your clothing!) and take up way less space than a standard pillow, however for car camping if you have space do consider a pillow as a stiff neck can ruin a camping trip. If anyone has come across a great solution for this do let us know!

Thursday 22 September 2022

Choosing a Tent

Choosing a tent can be confusing; there is a huge range of tents available, with different styles, features and prices.  Here's some guidance on what we look for in a tent.

Tent Size

This is the first decision you need to make.  Are you looking for a solo backpacking tent for one, or a large family tent that can sleep 6 (or even 8-10) with a separate living room?  

Tent manufacturers generally include the recommended number of people that the tent can sleep in the name of the tent. For example our Omega 350 is officially a 3-person tent (with a bit of extra room - hence the 50), while our larger family tent sleeps 5 and is known as the Icarus 500.  Most online tent retailers will let you filter your search results by sleeping capacity, and this will usually be the first question a salesperson in store will ask you, so start here.  If you want a little more space you can always go up in size by one or two above your actual numbers.

Bear in mind that a smaller tent will warm up faster, and stay warmer over night, due to body heat, so if you think you will be camping in the cooler shoulder seasons, you may want to choose a smaller tent.  Some of the National / Provincial Park sites are also too small for our biggest tent.


Omega 350Vango Omega 350 Layout  
Icarus 500Vango Icarus 500 Layout


Intended Use

Once you've decided on the number of people you want to sleep, the next consideration is what you plan to use the tent for.  Your intended use will determine the style of tent and let you focus on weight and packed dimensions.  If you plan to only use the tent for 'Car Camping', where you drive right up to your pitch, then you can afford to go for a bigger and heavier tent, which will likely give you more space and probably greater head room.  If your plan is to backpack, or bikepack, carrying all of your camping equipment with you, then you will obviously be more interested in a compact packed size and lightweight tent.

Backpacking Tent        

Car Camping Tent


This is how we've ended up with 4 tents!  A large family tent with living room for car camping, a medium size tent for boat camping or walk-in sites, a lightweight backpacking tent which all four of us can just about squeeze into, and an even lighter 2-person backpacking tent.

Weather conditions

Depending on where you live, and how dedicated you are to camping, weather may be important to you or not.  As our camping has been in the UK, Ontario, and British Columbia we always expect rain!

A tent's water resistance is usually measured as Hydrostatic Head or HH.  This is the height of a static column of water which the material of the tent can withstand before leaking.  Usually measured in millimetres, the higher the number, the more waterproof your tent will be.  For reference our Omega 350 has a rating of 5000 mm HH, which is one of the highest ratings from Vango.

Measuring Hydrostatic Head HH

Strong winds are another factor we always consider.  A good tent will have plenty of guy (or guide) ropes for additional stability.  The Vango tents also have an internal Tension Band system, which consists of additional bracing straps inside the tent which can be deployed in strong winds.

Tension Band System

It's not all strong winds and rain though!  Ventilation is a key factor in tent design, not only in hot sun but also to prevent condensation build up inside the tent.  Mesh openings in doors can allow improved air flow, while keeping out the bugs, and I always look for at least two vents in the outer flysheet for through flow.

Many modern tents now come with blackout bedroom areas which not only allow you to sleep longer in the morning by blocking out some of the light, but can also help to keep the temperature down inside the tent.

Other Features

As we always expect rain, we only consider tents which are erected with the outer flysheet first.  In many tents the poles are fitted to the inner part of the tent first, and then the flysheet is added over the top.  We don't like this design; if you are putting the tent up in the rain there is no way to avoid the inner tent getting wet.  Most tents which are fly first, also allow you to leave the inner tent connected making them faster to put up.  The only advantage we can see to an inner first design, is that you could leave the flysheet off in very warm weather, if you are confident it's not going to rain!

A sewn in ground sheet is essential for us, at least for the bedroom area.  The ground sheet should also extend up the lower sides of the inner tent, sometimes known as a bathtub groundsheet.  This keeps the bedroom area dry and bug free.  Look for a higher HH rating in your groundsheet.  On a recent trip to Bon Echo Provincial Park in our large family tent there was a huge thunderstorm overnight.  We woke in the night to find our bedroom area floating like a water bed!  Our groundsheet had a HH of 10,000mm though so we remained completely dry.  When we got up in the morning we were the only tent left in what had been a full Provincial Park. 

We prefer a tunnel tent design, rather than a dome.  You tend to get a much larger porch area to keep your bags and shoes dry in a tunnel tent, plus you can align a tunnel into the prevailing wind to maximise strength.  

Comparison - Vango Omega 350 vs MSR Elixir 3

As a quick example of choosing a tent, here's a comparison between the 3-person tent we use and a comparable tent available on the Canadian market.

Vango Omega 350 Tunnel Tent      
MSR Elixir 3 Dome Tent 

The table below shows some of the key features we have just discussed for the two models.  


Vango Omega 350

MSR Elixir 3

Sleeping Capacity

3/4

3

Erection

Fly first

Inner first

Rainfly HH

5000 mm

1500 mm

Floor HH

6000 mm

3000 mm

Packed Weight

4.25kg

3.19 kg

Packed Dimensions

49 x 20 cm

51 x 20 cm

Floor Area

4.3 sqm

3.67 sqm

Vestibule Area

~3.8 sqm

2.22 sqm

Cost

£240 ($360) incl tax

$400 (£260) + tax

We are massive fans of Vango tents, so much so that when we were looking for a larger family tent we had Sarah's parents post us one from the UK.  Hopefully you can easily see from the specifications above why we choose Vango.  

Which would you choose?