Monday 22 January 2024

Fitting Solar Panels to our Defender Camper

The second phase of Budgie's camper conversion involved fitting a solar power system.  After much research around split charge relays, battery to battery (B2B) chargers and battery composition, we ended up with a 175 Amp solar panel charging a lithium battery via a B2B charger.  

Having used Renogy equipment on our RV camping trailer in Canada, they were an easy choice for the Land Rover Defender.  (Use this link for a 7% Renogy discount code on your purchase.)

Mounting the Solar Panel


The first step was to mount the 175A solar panel to the roof.  The Alu-Cab Icarus roof conversion comes with a track system and we paid a bit extra for a set of Alu-Cab load bars.  The load bars are fitted with a t-track on the top and one side to allow simple fitting of accessories.  It seemed to make sense to fit the solar panel between two of the load bars, but we wanted the bars to still be available to use for other equipment (like skis).  

Land Rover Defender Alu-Cab Icarus Roof Bars

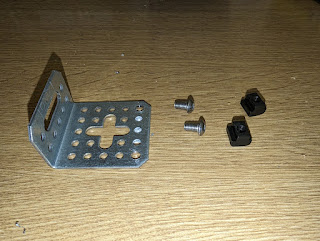
I'd seen a few people mount the panel flush with the bars, but I was worried about the panel getting damaged while loading, so decided to mount it below the bars.  A few aluminium angle brackets and some t-slot nuts, made it quick and easy to fasten the panel to the bars. 

Solar Panel Mounting Hardware for Alu-Cab Load Bars

The plastic end cap on the bars simply knocks off, allowing the t-slot nuts to be slid along the side-facing track.  Using M6 pan head bolts, each bracket can be fastened loosely to the track.

Alu-Cab load bar solar panel bracket

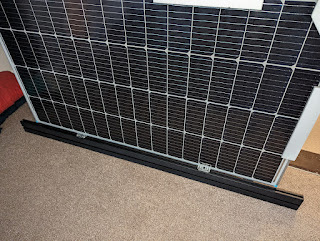
With two brackets fitted to the load bar, the panel can be offered up and the brackets slid into position to align with the pre-drilled mounting holes on the panel.  I used M6 flanged bolts and nyloc nuts to fasten the panel to the brackets.

Renogy loar panel mounted to Alu-Cab load bar

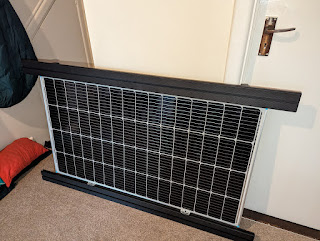
Repeat for the other load bar.

Renogy solar panel mounted to Alu-Cab load bars

Once the panel is fitted to the bars, the whole assembly can be slid onto the cargo track on the Icarus roof from the back.  Once in the final position tighten up all of the fasteners.

Solar Panel mounted to Land Rover Defender Alu-Cab Icarus roof

Running the solar cables

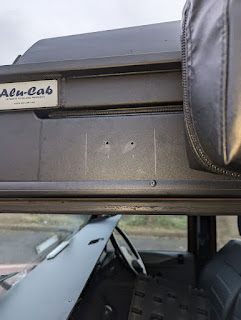
After removing the cab parcel shelf and the front passenger corner of the side panelling, I was ready to drill through the roof.

Drilling a pair of 18mm holes through the side of my new roof was terrifying.  Measure twice (or three times) drill once!

Alu-Cab Icarus solar panel wiring

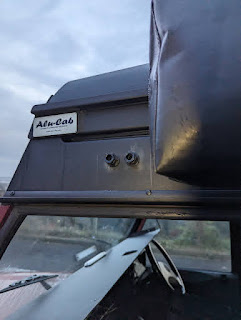
I used a pair of 20mm cable glands to get the cables through the roof and into the cab.

Alu-Cab Icarus roof with solar panel cable glands

I also fitted a cable entry housing over the top of the cable glands, just to be doubly sure that the holes were watertight.  The housing was sealed and stuck in place with sika-flex, and held in place with a ratchet strap over the roof while it cured.

Cable entry housing being fixed to alu-cab icarus roof

I decided to run the solar cables along the outside of the roof following the gutter line, which means they are mostly hidden behind the awning when the roof is closed.  Remember to leave enough length for the roof to open!

Alu-Cab Icarus Land Rover Defender Solar Panel Cables

I used a pair of 1.5m (5ft) solar cable extensions between the panel and the front of the roof, and then a 3m (10ft) solar adaptor kit from the front of the roof to the battery compartment.

Once inside the cabin, the cables can be run along the inside of the Icarus roof to the B-pillar behind the passenger door.  Routing down the B-pillar, takes the cables to the battery compartment under the passenger seat.

Read on for info about the internal wiring and fitting the diesel heater.

Read more about the rest of Budgie's camper conversion.


Wednesday 10 January 2024

An Epic Christmas Road Trip

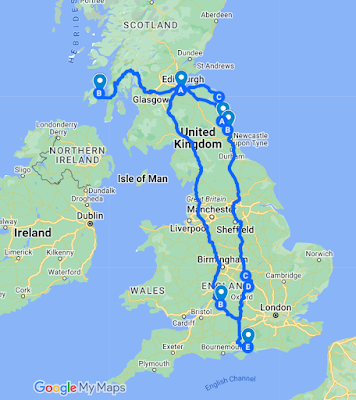
We're now back to reality with a bump after our Christmas break!  We travelled almost 1400 miles (2250km) in Budgie (our Defender); from our home in Portsmouth up to Sarah's parents in Edinburgh, down to Ridley's Dad in Northumberland, back to Edinburgh, over to our cottage on the Isle of Jura, then back home to Portsmouth via Edinburgh and Northumberland!

Portsmouth to Jura Map

Sarah's parents kindly looked after our dog, Hector, while we went skiing before Christmas, and we spent a lovely Christmas back in Edinburgh with Sarah's family, for the first time in 5 years.  Click the link to read more about our ski trip to Montgenevre.

Edinburgh Castle Sunset

We popped down to Northumberland and back in a day, to borrow a livestock trailer from Ridley's Dad, so that we could transport some tools and furniture up to Lorne Cottage.  We managed to time this trip during Storm Gerrit, so had a pretty horrendous journey down through flooded roads and snow, and we were glad we were in the Landy!  We opted to drive back via Berwick on the main A1 to avoid towing the trailer on the usual back roads.  Once back in Edinburgh we spent the rest of the day outfitting the cottage (our least favourite task is shopping, but we survived Ikea without an argument!) and loading the trailer, ready for the drive over to Jura the next day.

We had an uneventful, but wet, journey over to the west coast and a rather lumpy crossing over to Jura!

Defender and trailer with MV Finlaggan

Defender on the Jura Ferry

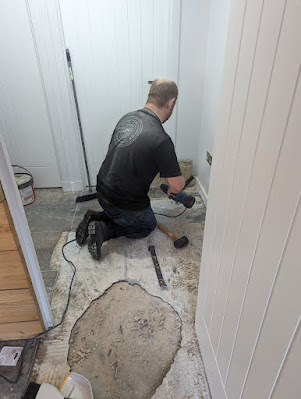
We knew that the cottage had suffered some flooding while we'd been away in Canada, and that some of the newly fitted floor tiles had lifted and cracked.  So we were prepared with tools and ready for some DIY!  Unfortunately the extent of the cracking was worse than we expected, and it was heart breaking to have to rip up the entire floor in the main bedroom.  Thankfully we managed to salvage enough full tiles which we can use to patch repair the broken tiles in the rest of the house, but we're going to have to re-lay the concrete and find some new tiles for the bedroom as the current ones are no longer in production.  That will be a job for February half-term!

Broken tiles and concrete

Lifting broken tiles

Sad looking dog on broken floor

It wasn't all doom and gloom though; the work we had done on the drainage out the back, seems to have done the trick, and the cottage was warm and dry!  Apart from the floor it was looking really good, and the furniture we had brought over really started to make it feel like home.

Happy border terrier with Jura tartan chair

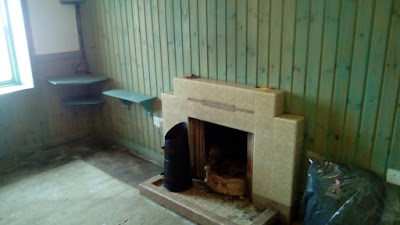
As it happened, it was exactly 20 years since Ridley took Sarah over to Jura for her memorable first visit.  The cottage certainly didn't look like it does now, back then it was a one bedroom cottage with only coal fires for heating.  We arrived over for Hogmanay (New Year) to discover that the shop had run out of coal.  Then there was a power cut, which lasted three days!  The pub and shop both shut for Hogmanay, and the only method of cooking we had was a disposable BBQ (there is no gas on Jura).  I vividly remember attempting to cook sausages and garlic bread wrapped in tin foil over the disposable BBQ in this fireplace:

Old fireplace

Of course the BBQ didn't generate enough heat to get the chimney to draw and the entire cottage filled with smoke.  We then had to open all the windows to clear the smoke, which made the cottage even colder.  Somehow Sarah still fell in love with Jura and agreed to come back!  This year we celebrated the anniversary with our first meal in the renovated Lorne Cottage.

Lorne Cottage dining table

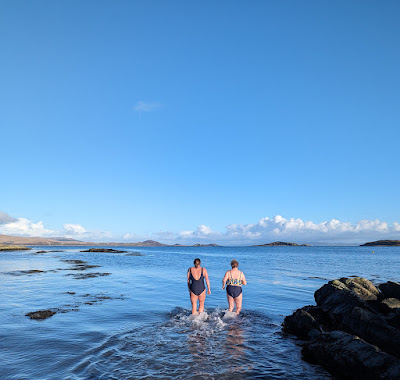
Jura certainly knows how to celebrate Hogmanay, and we had a great time celebrating with wonderful friends in five different houses over three days of parties (interspersed with smashing up tiles!).  The weather on New Year's day was beautiful, and we managed a quick dip in the sea from the beach in front of the cottage.

Wild swimming on the Isle of Jura

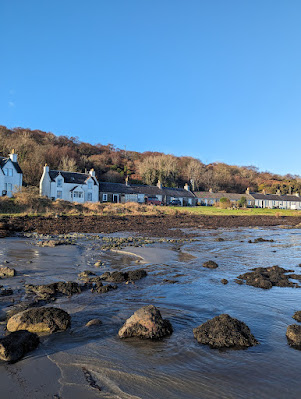
Lorne Cottage from the beach

We also spent our first night sleeping in Budgie's pop-top so that we didn't have to drive down the island after the New Year's Day party and despite the cold temperatures, we were cosy and warm in the roof tent.

Boys in an Alucab Icarus on a Defender

We were booked onto a late ferry from Islay on the 2nd of January, but because it is a Scottish holiday the wee ferry from Jura to Islay was running a reduced service.  This meant that we had to go over to Islay much earlier than necessary.  As it happened the earlier big ferry had just finished loading as we arrived in Port Askaig and still had space available, so we managed to drive straight off the wee ferry and onto the big ferry as it was about to depart - lucky timing!  We headed back to Edinburgh to return some borrowed tools to Sarah's Dad, and spent an extra evening with them.

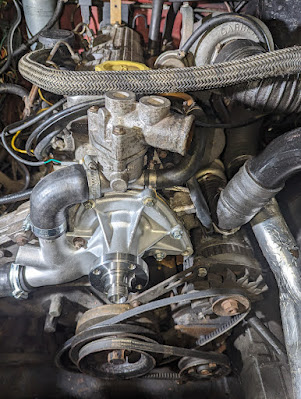
The next day we had planned to head back to Northumberland to drop off the trailer and spend some time with Ridley's Dad, but Budgie had other ideas!  We got about 10 minutes down the road before the battery light illuminated constantly and the temperature gauge rose rapidly.  We pulled into a petrol station to take a look, and discovered a large leak of water/coolant which was dripping onto the fan/alternator belt causing it to slip.  After a quick look around, Ridley couldn't identify where the water was coming from, so topped up the tank and headed carefully back to Sarah's parents watching the temperature gauge like a hawk!  Luckily they have a large garage, which we could fit Budgie in to take a proper look.  It took a couple of days to dismantle the fan assembly, identify the water pump as the problem, order parts, change the pump and re-assemble, but by Friday we were back on the road!

Defender 200tdi water pump replacement

We spent the weekend in Rothbury; including a trip to the tip to get rid of all of the broken tiles we had dragged back from Jura, helping out around the farm, catching up with the family, and a couple of meals out.

Alucab Icarus on a Land Rover Defender

On Sunday we headed back down to Portsmouth, with a quick stop for brunch and a catch up with friends in Morpeth.  Budgie performed perfectly and didn't skip a beat on the six and a half hour journey home.

We now need a holiday to recover from the holiday!  What did you get up to over Christmas and New Year?


Wednesday 3 January 2024

Skiing Montgenèvre

Shortly after we moved to Portsmouth, the boys realised they wouldn't be able to ski every weekend of the season, like they had been used to in Canada!  

After a bit of internet searching and researching European ski locations, we settled on a trip to Montgenèvre in France.  The small town sits about half way between Grenoble in France and Turin in Italy and is right on the border.  We flew into Grenoble Alpes-Isère Airport with EasyJet from Edinburgh, and had a private transfer with Snow Cab.


Welcome to Montgenevre

It's the oldest ski resort in France and it's possible to ski across into Italy to join up with the Milky Way resorts of Clavier and Sauze D'Oulx.  Beware that the Italian resorts open later than Montgenèvre; for our early season trip before Christmas the rest of the resorts hadn't opened.  There was still plenty for us to do though, with over 100km of runs and 38 lifts.  It's a good mix of beginners and intermediate pistes, with a few advanced runs.

Beginners ski area Montgenevre

View from the top at Montgenevre Ski

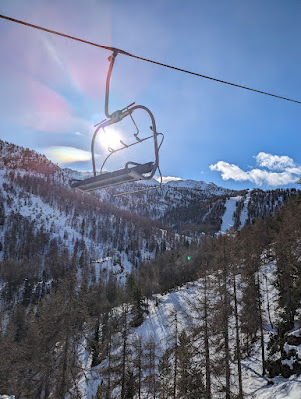
Montgenevre Ski Lift

The town itself is fairly small, but retains a rustic Alpine charm and has a good selection of bars and restaurants, and according to Innes all the food was 'delicious'!

Innes with a calzone pizza

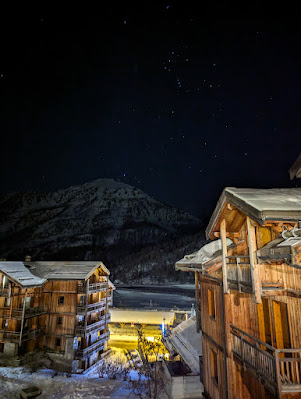
We stayed at the Résidence Club MMV le Hameau des Airelles, which is a collection of self-catering apartments in a number of chalet style buildings set around an outdoor pool. The location is ski-in / ski-out, but the access lifts hadn't yet opened when we were there. It was just a short walk over to the piste though and there is also a free regular shuttle bus which stops just outside the hotel. There's also a great bakery just across the road for lovely breakfast pastries.
 
Night time view from Montgenevre Apartments

Montgenevre Pool

We booked the flights, hotel and transfers through Heidi, who we highly recommend.

Not sure what to pack for your ski holiday? Check out our handy guide and printable ski trip packing list.


Friday 1 December 2023

Budgie the Land Rover Defender Camper

We purchased our new adventure wagon in October 2023 and we are now converting him into an off-road camper.  I'll keep this post updated as we progress with the conversion.

Budgie the 110 Defender

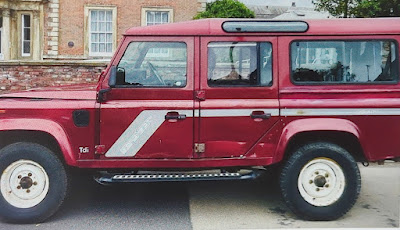
Our new vehicle is a 1993 Land Rover Defender 110 County Station Wagon with the 200Tdi (Turbo Diesel Injection) engine.  He was affectionately named Budgie by a previous owner's kids, apparently because he had a squeaky fan belt which chirped like a budgie!

Land Rover Defender 110 County Station Wagon

Land Rover Defender 110 County Station Wagon

Prior to our purchase, Budgie had an extensive renovation including a galvanised chassis and some serious rust repairs.  He even came with a photo book recording the work done.

We'd been looking for a Defender since we arrived back in the UK; Ridley was looking at newer models but Sarah spotted the advert for Budgie, who was just down the road from us.  The amount of work done meant that Budgie had already been 'future proofed', and we just couldn't resist.

Restored Land Rover Defender 110 CSW

Roof Tent vs Pop-Top

We'd been debating for a while whether to get one large family roof tent, two smaller roof tents, or a pop-top.  

We really enjoyed our time in the Yukon, where we hired a Jeep with a roof tent, but we found the soft cover a bit of a faff to pack away and we knew that the boys would soon outgrow the space available in most large roof tents.

Yukon Overland Jeep at Tuktoyaktuk

We seriously considered an iKamper or TentBox hard shell tent, but even the largest models didn't seem big enough for long term sharing for the four of us.

We thought about fitting two smaller roof tents, but it would require a specially adapted roof rack, and would be a considerable amount of weight up high, and pretty expensive.

In the end we decided on the Icarus pop-top roof conversion from Alu-Cab.  While the roof will only sleep two, it is raised in seconds and packed away in only a couple of minutes.  The pop-top has the added advantage of giving us standing room inside the Land Rover.  

Defender Camper Alu-Cab Icarus

Alu-Cab Icarus roof Defender 110

The roof was fitted for us by Tuff-Trek, along with an Alu-Cab 270 degree awning which wraps around the Landy to give us some outdoor shelter.  Tuff-Trek did a great job, and we highly recommend them. 


Fitting a Solar System to the Defender Icarus Roof

The next major upgrade was fitting a solar system to Budgie.  We went with a fixed 175 Amp solar panel fitted to the Alu-Cab Icarus roof bars and a battery to battery charger.  You can read more in our Fitting Solar Panels post.

Land Rover Defender Alu-Cab Icarus Solar Panel

Fitting a Diesel Heater to a Defender

The second stage of the solar wiring also included fitting a diesel heater to Budgie.  

Nakatanenga diesel heater console in a Land Rover Defender camper

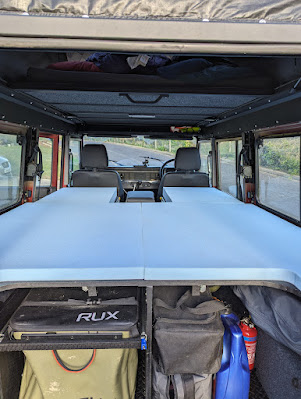
Defender interior layout for a family of four

The biggest challenge so far has been designing an interior layout that allows us to keep 4 travelling seats and comfortably sleep 4, but we think we've come up with a great solution!  Read more on our recent post - Can you sleep a family of four in a Defender?

Defender Camper interior layout to sleep four

Phone Holder

Anyone who's driven a Defender will know that there is nowhere to put your phone!  Budgie doesn't currently have a radio and we don't have a satnav, so we usually use a phone for music and directions. 

I'd been looking for a new phone holder for a while, and recently came across an eBay listing for a 3D printed adaptor that would fit in the ashtray space on the dash.  The adaptor allowed a Ram Mount to be fitted without drilling any new holes in the dash, and covered up the useless ashtray!

The adaptor was well made, and came with pre-marked positions which aligned perfectly to the Ram Mount 7" Tough Track.  After drilling a few quick holes in the adaptor the Tough Track was quickly bolted onto the mount using the bolts supplied with the adaptor.

Defender Ram Mount Tough Track Ashtray Adaptor

Once it was all bolted up, the assembly was fitted into the ashtray position and the securing arms tightened up with an allen key.  The 1" mounting ball can then be fitted onto the track and the X-Grip phone holder accessory fitted to the ball.  The track allows for additional accessories to be fitted later, I'll probably be adding a GoPro mount in the near future!

Ram Mount Tough Track in Landrover Defender

Ram Mount X-Grip in Landrover Defender

Overall it's a really quick and easy modification which solves the phone holder issue, only needs a drill and a couple of allen keys, is completely reversible, and makes use of the ashtray; highly recommended!

Adding a Defender roof access step

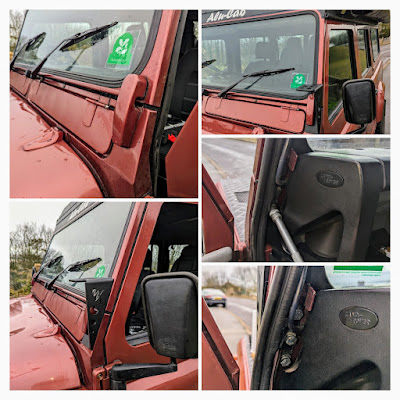
If you've ever tried accessing the roof of a Defender from the front, you'll know it's pretty easy to get up on the wings, but getting up the windscreen onto the roof is tricky.  I'm always worried about damaging the window gutter, or scraping the paint!

I spotted a great step on the LR Challenge 4x4 web site the other day, which really solves this problem (and looks good in the process - in my opinion!).

Defender Roof Access Step Windscreen
It's a quick and easy modification, which I managed to complete in my lunch break yesterday.  You simply undo three (13mm head) bolts which hold the window hinge in place.  You will likely need to pull the door seal trim out of the way to get the socket head in.  Replace the 13mm bolts with the longer (14mm head) bolts provided with the step, and position the rubber gasket and step over the bolts.  Tighten up the bolts and replace the door seal - job done!

Defender 200tdi Alternator Upgrade

Our alternator failed the other day and since it needed to be replaced anyway, we took the opportunity to upgrade from the standard 45amp version (which had been fitted since 1993) for a new 70amp alternator upgrade from Britpart.  This should charge our new leisure battery faster than the old alternator would have done.

* Make sure you disconnect the battery before starting work on the alternator!

I had a fear that there would be lots of other removals required to get the alternator out, like there was with the water pump a few weeks ago, but actually all it was pretty straight forward.  All it required was the removal of the air filter housing (which can just be unfastened and moved over to the side) and an air pipe to the turbo (2 jubilee clips).  With these out of the way, it was just a case of undoing the three securing bolts. 


The new alternator had slightly different wiring connections on the back.  On the old alternator the wire from the dash warning light (thin yellow and brown) was connected to a D+ post, but after some friendly advice from the LRUK Forum, I was informed that this had to be connected to the smallest pin of the three pin plug position. So I had to change this wire from a ring connector to a small spade.  I also had a blue/brown wire connected to the D+, which appeared to be a non-standard addition.  I traced this wire back to a relay inside the back door. This relay controls the power to a socket that charges a caravan battery whilst towing, so that the circuit is only live while the engine is running.  I wired this to the same small spade connector.    


The new alternator also came with a new red cable, designed to take the higher output from the alternator.  This was wired to the B+ terminal along with the original thicker brown wire.  The other end of the new red cable was connected to the positive terminal on the starter motor (in parallel to the brown wire - but following a shorter route).  It's a bit fiddly to reach the terminal on the starter motor, but can be done without any further removals, if you lie on the wing and reach down!


Once everything is wired up, the new alternator was placed into position, the three securing bolts were loosely fastened, and the alternator belt replaced.  Then the belt is tensioned and bolts tightened up.  The whole job probably took about 3 hours, but would be much faster if you had standard wire connections.



Monday 23 October 2023

Back in the UK!

Well it's almost two months since we moved back to the UK, and we're still kind of getting over the culture shock, but as usual we're making the most of things. The boys are enjoying lots of UK snacks that they had totally forgotten about (as is Sarah!) so every trip to the store is bigger than intended.....  It's been great to catch up with old friends and family, although we've still got lots more people to catch up with!

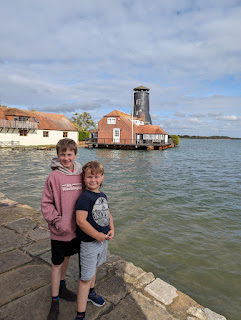
Langstone Windmill, Hampshire

Exploring our new home has been fun, and we've managed to keep some of our Canadian traditions like pumpkin picking before Thanksgiving, this year joined by the boys' Uncle, Aunty and wee cousin - there are some advantages to the UK.  After a world of pain navigating the UK school application system the boys have settled into their new school and have restarted skating lessons, and joined a great local rugby club.

Pumpkin picking at Tulley's Farm

First Day School Photo

We're missing our outdoor gear, which we shipped over from Canada and should hopefully arrive in a few more weeks.  Being unable to camp, we had a great weekend in a Shepherd's Hut, just up the road from home in the South Downs National Park.  We booked through Hipcamp, which is a great website listing cool camping and glamping spots in both the UK and Canada (amongst other places).  Use the link above for £10/$10 off your first stay.

HipCamp Shepherd's Hut, South Downs

Our Canadian Land Rover has now gone to a loving new home, and we just picked up another Defender last week - he came already named 'Budgie' so we are sticking with that - welcome to Team E Budgie!  We've already had a great proving run from Portsmouth to Edinburgh (about 450mi / 725km), and we're booked in to have a new pop-top roof fitted next month which will be the first stage in creating our new camping adventure wagon!

Budgie the Land Rover Defender 110

I'm sure there's lots more adventures to come, so stay tuned!